
Phalaenopsis or moth orchids, are long-flowering elegant houseplants that have soared in popularity, not only gracing the shelves of nurseries but now of most supermarkets too.
Orchids are epiphytes and in the wild grow on tropical tree branches, obtaining light filtered down through the canopy but orchids are not parasitic; they use aerial roots to absorb moisture and carbon dioxide so are watered and fed by the humidity surrounding them.
After a while, our potted orchids at home need reviving so take time to look at your plant’s leaves, flowers, and roots to work out if there is a problem or is it just resting? Then read on to get the low down on how to care for orchids.
Roots
Take your orchid out of its pot and look at the roots. Some will be growing out of the pot in the air and some have hunkered down into the growing medium. Get rid of any old, withered material, snip off the dead roots. This will give healthy roots more space to flourish.
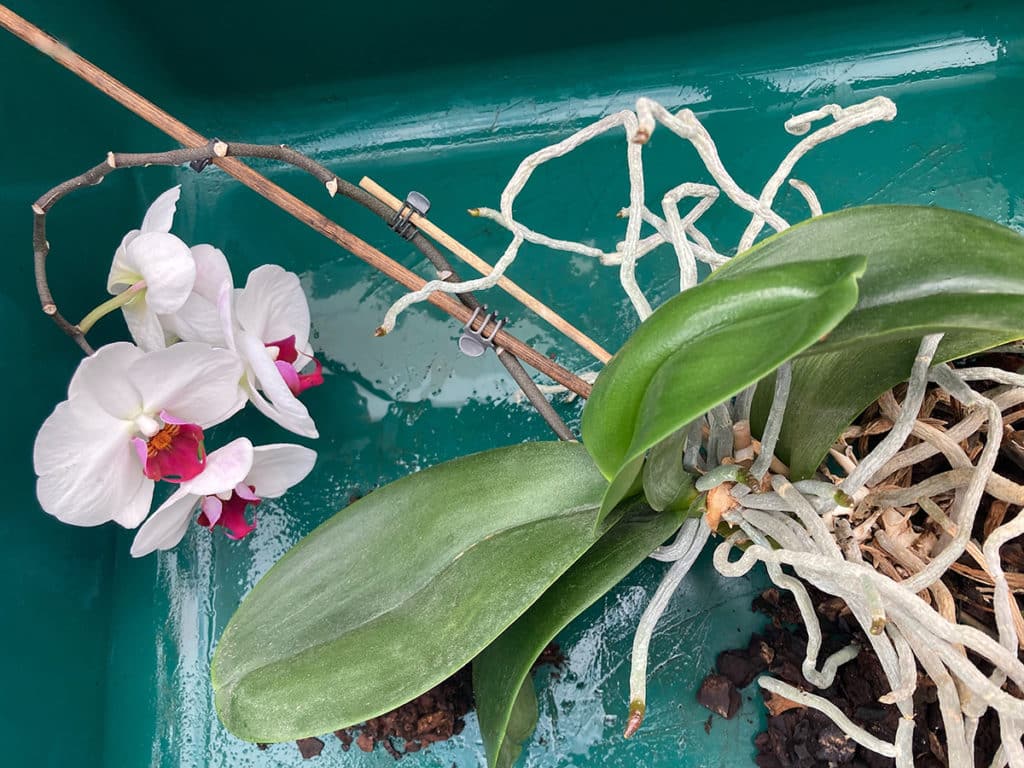
Aerial roots are the orchid’s blood vessels, coated in cells called Velamen which act like a sponge. Healthy air roots are silvery-white and rounded, unhappy roots are beige and shrivelled. Ailing roots could be due to low humidity so snip away the shrivelled roots, mist with Plantsmith’s Invigorating Orchid Care Mist and place your plant on a tray of watered gravel or small stones, this will raise humidity.
If you notice roots circling the rim of the pot, it could mean the substrate is too dense for roots to grow through or that it has deteriorated; whatever the reason change your growing medium.
Repot
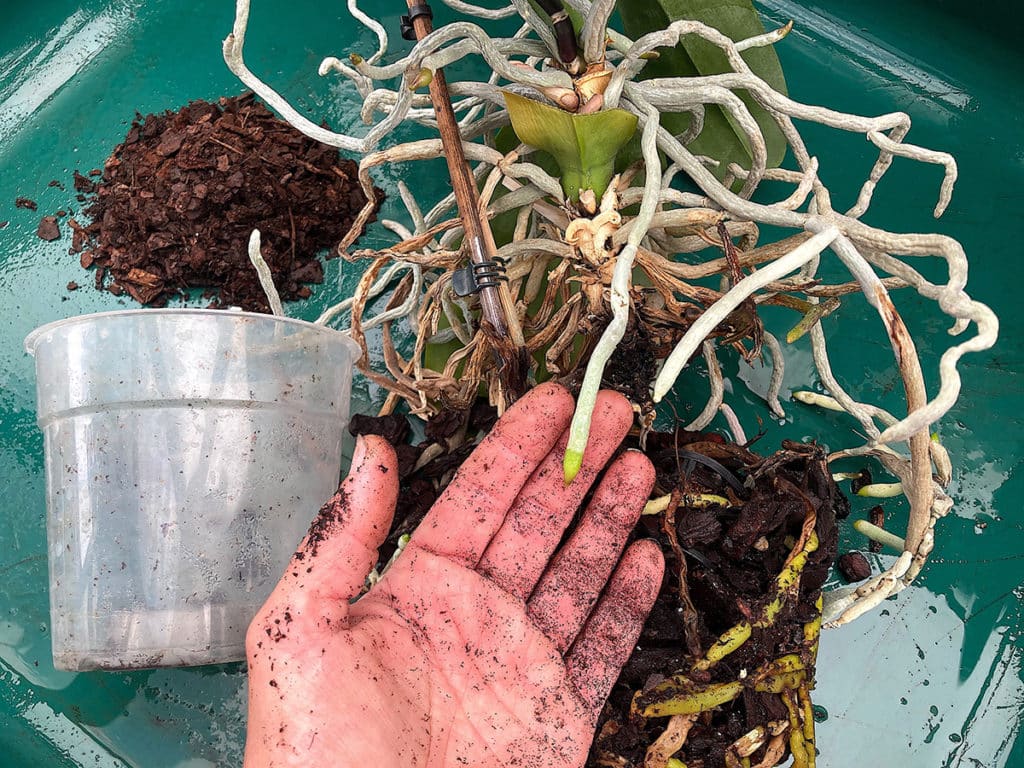
Every year or two it is good practice to repot your orchid. If orchids have been in the same pot for a long time then fungal diseases can build up, growing medium breaks down and roots get congested. Water may have sat in the pot or around the roots causing them to rot. Take the orchid out of its pot and flush roots with rainwater.
Refresh your potting mix. Use shredded bark chips or a professional peat-free compost bark mix to support roots, and if you have one, a clear pot so roots can photosynthesise but if you really want to display Phalaenopsis in your favourite opaque pot then just regularly remove your plant from its outer pot and leave it out on a bright windowsill so roots get access to light.
Shredded bark helps retain moisture but not stay too wet, it is also slow to break down and release nutrients. It allows roots space to breathe and keeps them aerated. There are also inorganic substrates you could use of various textures and consistencies like rockwool, horticultural foam or perlite but these do not hold any nutritional value.
Light
Place your orchid in a warm bright space in indirect sunlight and give it time to rejuvenate. In the wild they are used to filtered light so make sure they are not scorched by direct sunlight in a hot spot. They thrive in a constant temperature of around 18°C / 64°F.
If your orchid is not producing flowers it will be due to light or temperature so do not be afraid to move your orchid to a different area in your home. It can sometimes be trial and error until you find the perfect spot.
Water
Orchids like humid conditions and grow particularly well in bathrooms and kitchens. Mist leaves with water or use Invigorating Orchid Care Mist which contains 12 essential nutrients to boost orchid growth and enhance flowering.

Orchids detest soggy roots and will not thank you for sitting them in a pot of water so the best way to water is remove them from their pot and dunk or flush with rainwater whether in a sink or bath and let the water drip through. Return to their pot once excess water has dissipated.
Equally orchids will let you know if they are not getting enough water. If you notice withered leaves, get dunking!
Water thoroughly once a week in the growing season and mist every two to three days.
Clean
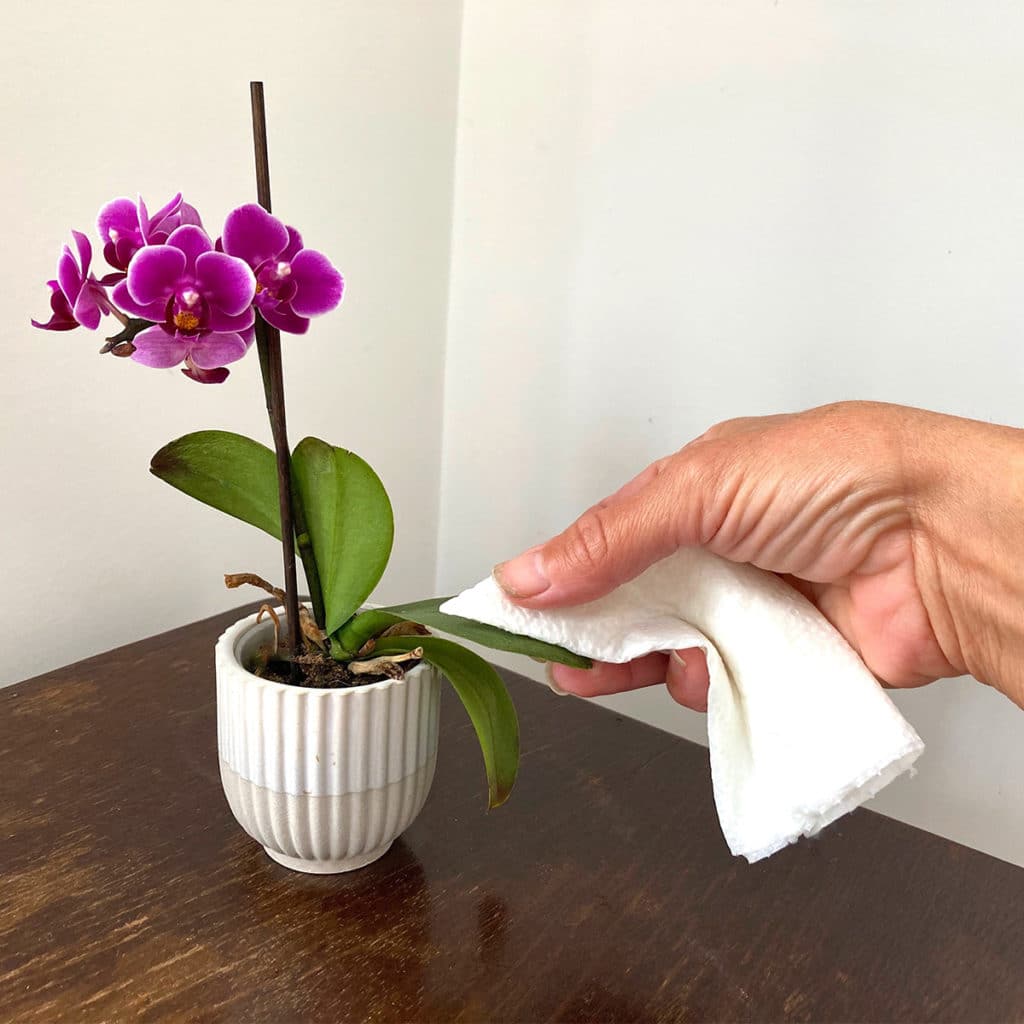
Orchid leaves have a large surface area and are prone to collecting dust so take a damp cloth and gentle wipe the leaves down to remove dirt. This will ensure the plant can easily photosynthesise and stops dust clogging up pores or hindering sunlight.
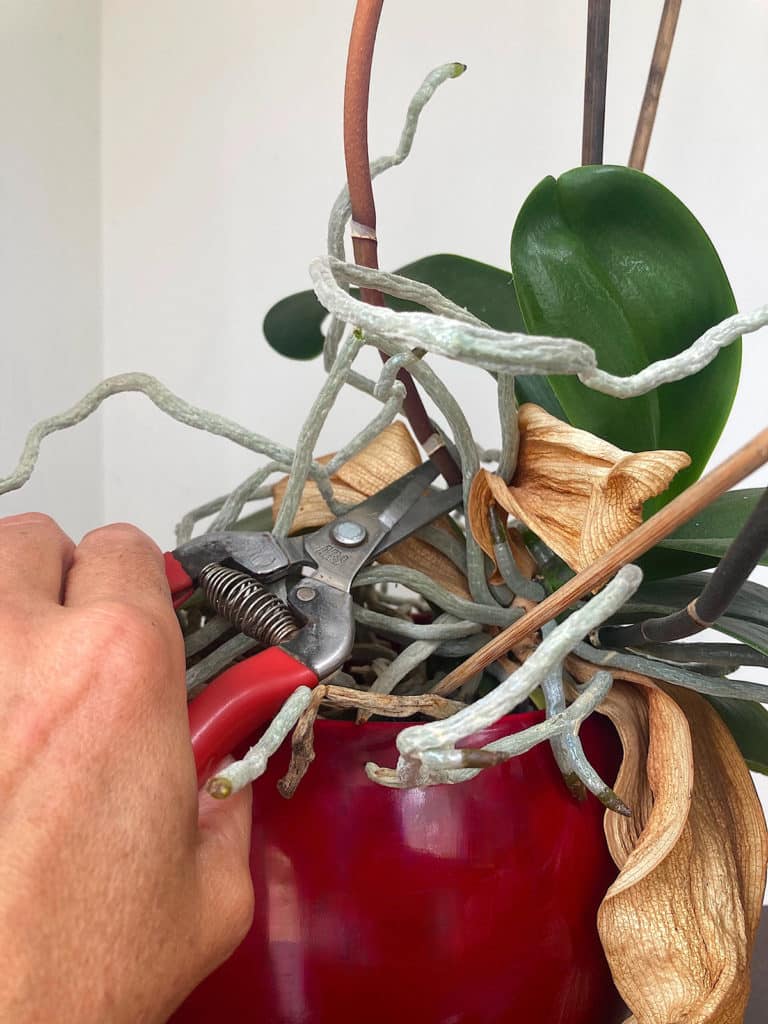
Deadhead and Prune
There is often confusion with how to prune and deadhead orchids once flowers have passed their prime. Often flowers will just fall off when they are over but you may notice the stem has changed colour from green to orange – reminiscent of a dead stick! Simply snip the stem back to green stem above a node and disregard the dead material. This often promotes new flowering. Only take the stem right down to the base if the whole stem has died back.
Feed
Feed your orchid every couple of weeks when it is actively growing, producing leaves and flowers. Firstly flush water through the growing medium and let the water drain then water again using Plantsmith Nurturing Orchid Feed and Tonic which is a professional formulation orchid feed containing 12 essential plant-boosting nutrients – everything your orchid needs to thrive.


